My first attempt at this style of inlay as a student and I remember it took me a full 8 hours to complete,and that didn't include the prep of the material. I have since become a bit faster and it now only takes me about 2.5 hours to inlay one star the same size as the first (7" x 12").
The inlay material is traditionally holly and rosewood, two distinctly different colors, perfect for the contrast. Over the years I have tried many combinations of contrasting wood. A suggestion is to use two contrasting wood of the same hardness/density. The inlay material is prepared by planing the two contrasting woods to the same thickness and gluing them together. The center line of the two becomes one of your references when inlaying the wood.
 The strips are ripped on the table saw, with a zero clearance insert, and wooden push stick to safely push the pieces past the blade. I also use a 1/16" thick sawblade to cut down the amount of kerf waste.
The layout of the compass star is just geometry. North & South, and East and West compass star rays are perpendicular and NE, NW, SE & SW are 45 degrees. Draw a circle with a compass to determine the inner circle of inlay.

Use the dividers to measure one half the thickness of the compass star stock and mark that dimension on each side of the compass cardinal and ordinal directions.
 Use the same dividers to set the length of the rays of the compass star.
I use a scalpel,actually a post-mortem knife to scribe the lines to determine the area to be excavated and receive the inlay.

Pictured below are the low tech (Stanley 271 router plane, the way I did the first compass star) and medium high tech (Dremel with router base attached) way to excavate the area to receive the inlay. I guess the high tech way would be a CNC machine.

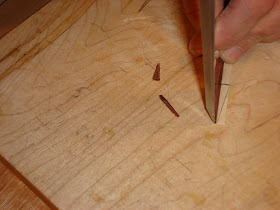
I use my scalpel to completely excavate the area that the Dremel bit can't get into. The excavated area becomes the template for cutting the inlay to fit. Remember the center line of the stock lines up with the cardinal and ordinal points.

I use a sharp chisel or plane iron to cut the stock close to the line.

And, I use a block plane to cut the point to make an exact fit.

I glue one section in place before I go to the next, leaving a section in the center unexcavated to prevent the delicate background area between the points of the compass from collapsing.

Inlaying one compass point at a time.

The photos above were taken by me to accompany the text for an article I wrote for WoodenBoat Magazine published in the 2008 May/June Issue. The article has much more in depth description of the process of inlaying a compass rose. The background wood in the above images is mahogany and the inlay is holly and rosewood.
The photo below is a compass star that I put on a desktop for a piece I recently made for a client. The desk is cherry and the inlay is holly and rosewood.
 I will be teaching a one day workshop on Inlay for Furniture Making, August 13th at Dartmouth College's Woodworking Studio located at the Hopkins Center, Hanover, NH. Use this link for more details.http://hop.dartmouth.edu/calendar/summer-woodworking-at-dartmouth
Please visit my personal website: www.jacwoodworking.com to see my work and more examples of inlay that I have used in my furniture making.
From first step to the last step, it looks like a magic process. It is really a great Furniture Making. For me, it's a feast for the eyes. Thank you for sharing. i have keep the those photo to my computer.
ReplyDelete